

A root cellar is a storage space built underground to preserve perishable items like fruits, vegetables, and other root crops for an extended time.
The root cellar’s environment provides a cool, dark, and humid environment that helps slow the natural decay process and keeps produce fresh during hot climates or winter months.
Traditionally, root cellars had been used in rural areas where people relied on homegrown food and needed a way to store their harvests longer without refrigeration.
However, they can still be functional for homeowners interested in preserving food without relying solely on modern technology.
In fact, a root cellar is a perfect storage solution in an off-grid situation where underground space might be limited.
Because constructing a traditional underground root cellar may not be feasible, you can still adapt the concept of a root cellar to build a simple root cellar in a box and work within the constraints of a grid environment.
What Can You Store In A Root Cellar?
Not all fruits and vegetables store well in root cellars. However, hardy fruits and a few root veggies can survive the root cellar’s environment.
Here are fifteen fruits and veggies that do well in a root cellar: apples, beets, brussels sprouts, cabbages, carrots, garlic, leeks, onions, parsnips, pears, potatoes, pumpkin, squash, sweet potatoes, and turnips.
Construction
Constructing a root cellar in a box can be a practical option if you have limited space or resources in your backyard.
But before construction begins, it’s essential to remember that the design you choose varies depending on the climate, available resources, and personal preferences.
Here’s a step-by-step guide:
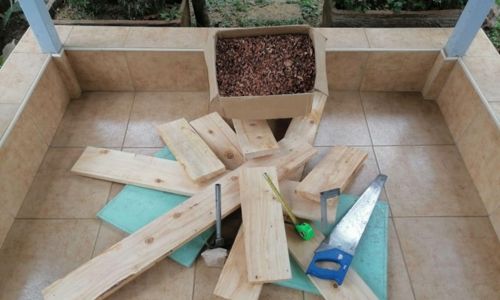
Step 1: Gathering all the necessary supplies and materials
You will need a few materials for this construction. Luckily, a root cellar in a box requires a few materials.
You will need some sturdy wooden panels, two paving slabs, gravel (optional), and sawdust/straw.
Step 2: Building the box
Always choose the precise box size to accommodate your desired produce when constructing. Consider using materials like wood or thick Styrofoam that provide good insulation.
Related: Root Cellar Mistakes You Need To Avoid At All Costs
In my case, I used termite treated 4 (feet) x 2 (feet) x 2 (feet) long wooden panels to construct the cellar’s frame. This size was enough to store a handful of root crops.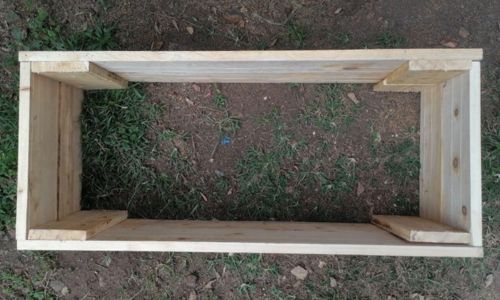
Note: You can still use long wood panels to build a larger box if you have enough space in your backyard.
I left the bottom open to allow adequate drainage and effective humidity control. Instead, I will place two paving slabs at the bottom to give the cellar a nice finish to discourage termites, moles, and other critters from accessing my produce.
Step 3: Ventilating the cellar
The next step will be drilling ventilation holes in the sides of the box to allow for airflow. These holes will also help regulate temperature and prevent excess moisture buildup inside the box.
But you’ll need to place the holes at the top (to allow warm air to escape the cellar) and the bottom section to allow cold air to enter.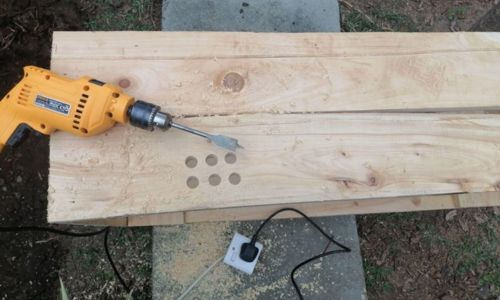
Step 4: Attaching the doors
I used some two old cabinet doors because they were still in perfect condition for the opening.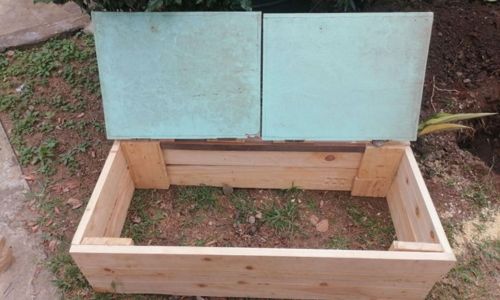
Step 5: Choosing a spot and digging the hole
Choose a well-drained spot and dig a hole about 1 foot larger than the box on all sides. But remember that the area chosen should not be near a tree because the roots of the tree might grow and crack the cellar.
You should also consider a deeper hole to store produce below the ground if winter temperatures drop below 25֯C.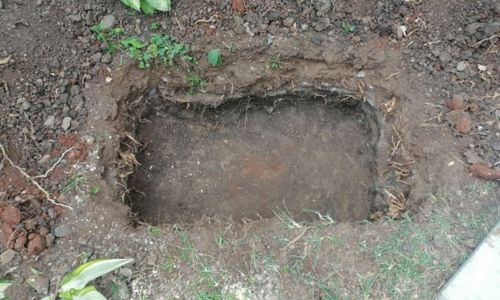
Step 6: Inserting paving slabs
I carefully inserted two paving slabs inside the hole to levelized the root cellar floor and to prevent moles and mites from accessing my produce.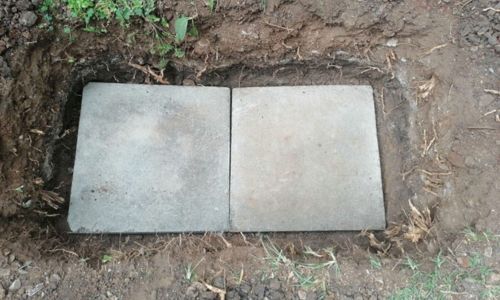
Step 7: Insulating the box
I used sawdust to line the walls and floor of the box. This insulation will help maintain a stable temperature inside the box. But you can use straws or foam panels, depending on what’s available at home.
Related: Straw-bale Bug Out House: How One Of Our Readers Did It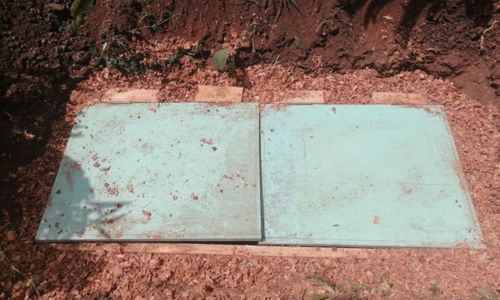
Note: I placed a layer of damp sawdust at the bottom to maintain the perfect humid environment.
Tips:
- You need to place a container of water inside the box to increase humidity levels. This will help prevent wilting and drying out of the stored produce.
- You can also add damp sand or sawdust to the bottom of the box to further enhance humidity control.
- Install shelves or racks inside the box to maximize storage space and organize it better. But use sturdy materials that can withstand the weight of the stored items.
Step 8: Storing Produce
Arrange your fruits and vegetables, making sure to leave some space between them for proper airflow.
I placed onions and carrots in the box and covered them with about an inch of sawdust, but you can use peat moss as an alternative solution.
Afterward, I placed potatoes and cabbages and added a layer of sawdust.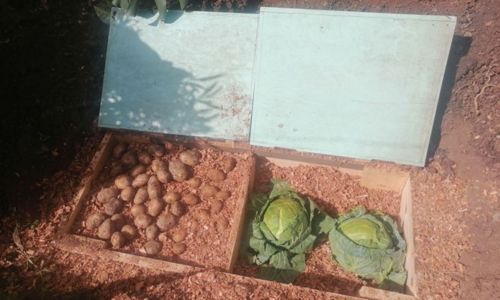
Continue layering the roots with sawdust until you fill-up the box. This arrangement will help moisture distribution and minimize crop rotting.
Related: 10 Vegetables That You Can Stockpile Without Refrigeration For A Full Year
You should store items that require similar temperature and humidity conditions together.
Check the root cellar box regularly to ensure the temperature and humidity are within the desired range. You can adjust ventilation and insulation as needed.
Features And Considerations
Here are some key features and considerations for a root cellar:
- Location: Ideally, a root cellar should be partially underground or underground to maintain consistent temperature throughout the year.
- Ventilation: Proper ventilation is essential to regulate temperature and humidity inside the root cellar. You can achieve it through vents or pipes that allow fresh air to circulate while preventing excess moisture buildup.
- Insulation: Good insulation regulates the temperature inside the root cellar. To prevent heat transfer, you can use soil, straw bales, or insulation panels along the walls, ceiling, and floor.
- Humidity control: Fruits and vegetables require a humid environment to prevent wilting. So, you can maintain moisture in a root cellar by placing water containers, damp sand, or covering the floor with layers of moistened sand or sawdust.
- Shelving and storage: You can install adequate wooden slats, wire mesh shelving, and racks to store the produce to ensure proper airflow around the stored items and prevent mold/rot.
- Temperature regulation: The ideal temperature for a root cellar is typically between 32°F (0°C) and 50°F (10°C). To achieve this, use the natural coolness of the ground to bring in cooler air during hot seasons.
- Pest control: Use the correct approaches to prevent rodents, insects, and other pests from entering the root cellar. Seal openings or cracks and regularly inspect/clean the cellar.
A root cellar is an old-fashioned but effective technique for storing root crops at home. It is among the perfect solutions in a grid situation because of its simple eco-friendly design and natural preservation characteristics.
With this root cellar in a box design, you can preserve fruits and vegetables over the winter months.
You may also like:
 EMP Prevention Plan: Why Our Government Has Done Nothing
What To Do With All Your Frozen Food Once The Power Goes Out (Video)
6 Warning Signs Before An Economic Collapse That Most People Miss
Weird Survival Items That Might Save Your Life
