
Coming up with a list of items for packing an emergency kit is the easy part. Books, websites, blogs, and YouTube videos abound with that information. Find my own emergency kit list here and in Chapter 11 of my book.
What’s a little trickier is packing all that stuff in a way that makes sense, so that each item can be found when needed. In this article, we’ll cover the steps you don’t want to miss when stowing your gear.
Table of contents
But first, let’s talk about the container for your kit
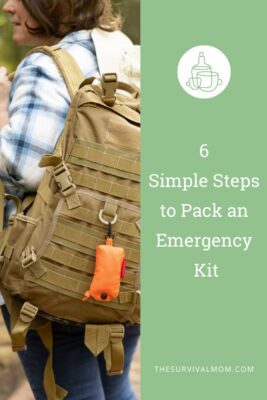
When most people think emergency kit, they immediately think Backpack! Not surprising, really. Backpacks are ubiquitous and come in all shapes, styles, sizes, and price points.
However, the backpack is only one of many options. That’s good because there are many reasons one might not be able to wear one. Consider, for example, if you have back problems or a baby, are elderly, or have some other circumstance that precludes using this type of bag. A rolling suitcase on wheels or a wheeled cooler or another type of portable container might be a more functional choice. Read this post for more ideas for unconventional containers for your emergency kit.
You want to consider the purpose for which you are packing the emergency kit. That reason guides you in your selection process.
For the purposes of this article, we’ll be using the backpack as our container. Just know that the general principles are going to be the same regardless of what you select to hold your kit.
A quick overview of packing my daughter’s emergency kit
My daughter and I packed her school emergency kit using an excellent bag by Flying Circle Bags. They sent us their Presidio bag in Coyote Brown, and we have really enjoyed getting to know and use this bag. I also appreciated its affordable price.
Multiple compartments
Many folks grab the first available backpack they see, which is often a school backpack. These typically have a single large compartment and one or two zippered pouches on the exterior of the bag. In a pinch, this is better than nothing.
However, in a real emergency, you want a bag that is high quality and comes with many, many!, different pockets, slots, and pouches. Having multiple places to store things helps a great deal with organizing your supplies. More on that, and what to do if you DON’T have lots of cubbies, a little later.
The Presidio bag met and exceeded our expectations. It’s definitely large enough to carry school books, supplies, and a laptop. It even has a clear vinyl touchscreen pocket for tablets. Access your iPad or other tablets while it’s safe inside this pocket! That was a nice, innovative feature that I didn’t expect. The large center section has four interior pockets. Plus, there are other small storage areas galore.
Comfort level
We’ve found the pack to be comfortable with its padded shoulder straps, adjustable sternum, and waist straps, and padded back. It is on the smaller size when compared with other, similar packs designed for men. Its size brings up the one potential issue that some may find with the Presidio. If your pile of things to pack is enormous, you may want to find smaller versions of some items in order to have enough room. In any event, we both give this bag 2 thumbs up!
Now, let’s get that pack organized and packed properly.
6 Steps in Packing an Emergency Kit
Remember: the general principles are going to be the same regardless of what you select to hold your kit.
Step 1: Assemble all your supplies
No matter what list(s) you use, remember to pause and first, look around to see what you might already have. One reason some moms never finish packing their emergency kits is that they have a long list of things to buy and the budget is tight and who knows when the money will be there.
If you start looking through cabinets, the junk drawer (Take this fun junk drawer challenge!), the garage, the trunk of your car, etc., you may be pleasantly surprised to find that you have far more items for your kit than you thought. For anything else still on your To Buy list check Craigslist, Freecycle, eBay, in garage and estate sales, dollar stores, and thrift stores.
Step 2: Make sure your bag is the proper size and high quality
When you see that pile of supplies before you, you may panic and head for the largest possible backpack on the market. Don’t do that yet!
First, make sure that each item is something you need for the purpose of the bag. If you still need to cut back on contents, look for products that serve multiple purposes and for smaller versions of what you have in the pile.
Personally, I make good use of my Food Saver to vacuum pack items like toilet paper (remove the inner cardboard tube before vacuum sealing) and medications.
Step 3: Set up your bag for easy organization
Unless your bag is blessed with a myriad of pouches and pockets, you want ways to keep things from ending up in one big pile in your bag. That makes things hard to find when you need them, especially in a stressful event. Some options for organizing include:
- Ziploc bags (Lots of different sizes of these!)
- Small coin/cosmetic cases
- Packing cubes
- Altoid tins
- Zippered clear plastic bags that sheet sets, blankets, and comforters come in
- Vacumn sealed bags (Good for things you don’t need to access frequently.)
- Cocoon organizers (This is easily slipped into any one of several pouches in a bag. It holds things like a tiny bottle of hand sanitizer, a pen, or an inhaler.)
The Key to Functional Organization
The key is to use small containers to keep like things together and organized.
Waterproof/resistant
Often, this involves simply using Ziploc plastic bags. If you’re packing something like an Altoids Tin Alcohol Stove and fuel, that can go in a bag by itself, along with extra fuel. A big advantage of the Ziploc bag is there’s no need to label them since the contents are easily seen and obvious. Using these bags also keeps the contents from getting wet. If you have containers with any liquid, be sure to double up on your Ziploc bags. Another way to keep items dry is to vacuum seal them.
Hard plastic cases
Though they can be pricey, I also like using hard plastic cases, such as those made by Pelican. These types of cases are available in a wide range of sizes and colors and work very well at keeping your gear both dry and protected from being crushed. I use one such case for my primary fire-starting kit because keeping it waterproof is essential.
Grid-style organizers
Another product I dearly love and heartily endorse is the Grid-It Organizer. It consists of a hard, flat board of sorts covered with a mesh of elastic bands of varying lengths. This is a truly awesome solution for organizing little odds and ends in your bag; it keeps them secure and within easy reach. Many backpacks today include flat pockets for use with tablets or small laptops. Those pockets are great places for a Grid-It Organizer.
Whatever tools you decide to use for organizing your gear, the overall idea here is to keep things from just floating around in your pack. You want to know where everything is so you can find it easily, even under stress.
Step 4: Categorize your contents for better organization
Categorizing works in lockstep with the organizing of Step 3. Whenever I’ve been in a true panic, everything is confused — my thoughts, my words, my world. The last thing a mom needs in a moment of crisis is to dig through a dozen pockets looking for a pair of scissors or Quick Clot or some other item. This is why Step 3 is so necessary.
Go through everything in your pile of emergency stuff. Sort it into my favorite categories, the Seven S’s of Survival:
- Sanitation
- Security
- Survival sundries
- Sustenance
- Sanity
- Seasonal supplies
- Shelter
You can read more about these in detail, as well as emergency kit items in each category. As you begin to sort, your kit will start to take shape. You may have all your sanitation items together, only to discover that you’ve somehow left out a small bottle of hand sanitizer or vacuum-packed tissues.
With each category, consider what your particular family needs, such as medications, dietary requirements, or small distractions for young children.
Step 5: Put most important items in outside pockets
The groupings with the most or largest items are necessarily placed in the largest pouches or pockets. However, for quick access keep items such as a flashlight. first aid kit, or charger in outside pockets or other easily accessed location.
Do you think you’ll want personal sanitation items at the ready?
Ladies! Do you really want to dig to the bottom of the bag to find your feminine supplies? I think not.
Now, if you’re using a container without any kinds of cubbies, then the organizational tools you selected in Step 3 take on increased importance. Make sure they’re the easiest to access and that you can immediately tell that you’re grabbing the exact items you need. They might sit on the very top of the items in the cooler. Or affix them to the lid somehow so there’s no chance they become accidentally buried among the other items.
Think to yourself, if an emergency happened RIGHT NOW, what would I want to get my hands on first?
A flashlight?
A handgun?
A pocketknife?
You shouldn’t have to dump out your entire pack just to get to your first aid kit.
Give some serious thought as to which items in your pack you’ll likely use most often and items you’ll need first when stopping for the night or dealing with an emergency.
How to Pack Heavy Versus Light Items
Now, that said, it’s best to keep the heaviest items close to your spine and/or toward the top of the pack. Keep those items centered as best you can, so as to not adversely affect your center of gravity.
If you keep the heavy stuff too low in the pack, it will feel like the pack sags. Too high and you’ll feel off balance. Ideally, if packed correctly, the bug-out bag will feel balanced and stable.
One other thing that should be easily accessible is a last-minute packing list. This is for those items not kept in kits stored at home but that you want to grab before running out the door.
Step 6: Each person should pack their own kit, so they know where to find each item
Before you know it, your kit will be fully packed. You’ll be tempted to move on and prepare everyone in the family. While that desire is a good thing, it really is best if each person packs their own kit.
If you’ve ever had someone make a grocery list for you, you know how disconcerting it is to arrive at the store and have to figure out, from scratch, what you’re supposed to buy. It’s when you write the list or pack the kit that it makes sense. Even young children should go through this step of packing an emergency kit themselves, with your supervision.
Final Thoughts on Packing an Emergency Kit
There are many, many events that might require a quick grab of an emergency kit. Things such as a house fire, flood, tornado, or another natural disaster. It’s worth taking some time now, on this side of those events, to get a high-quality pack and begin making your own, customized kit.
What have you found most helpful when packing an emergency kit?
Originally published September 14, 2014; updated and revised by Team Survival Mom with contributions from Jim Cobb.