

SHTFPreparedness may collect a share of sales or other compensation from the links on this page.
Have you ever wanted to build a DIY deer feeder but never knew how to do it?
Find out how to make your DIY feeder and why people want to place these feeders on their property.
If you’re feeling industrious, you can even set up cameras near your DIY deer feeder to comfortably watch the action from inside your home.
Until then, you can recycle existing materials to build your feeder.
How to Build a Deer Feeder?
You can construct a 5-gallon DIY deer feeder or a 55-gallon DIY deer feeder. But if you prefer to save on expenses, you can use the equipment in your garage, and a 5-gallon feeder is an excellent way to start.
There are plenty of DIY deer feeder instructions available on the internet, but this article focuses on recycling the items standing around, wasting space.
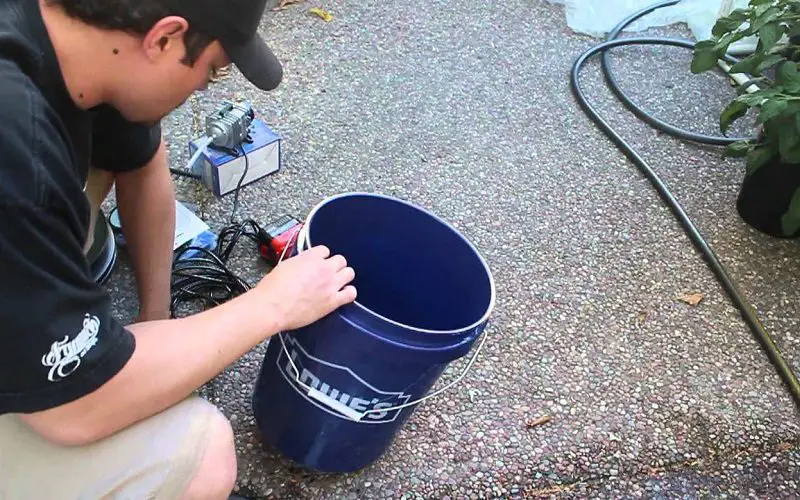
The chances are that if you’re a handyman or a hunter, you will already have a 5-gallon drum in your garage, so that is what you’ll use for your DIY deer feeder.
A 5-gallon drum may not be the biggest feeder around, but it is an excellent place to start. If you aren’t into handyman jobs or don’t have a 5-gallon drum available, ask a neighbor if they will donate one for your new project.
Don’t let the simple concept of the DIY deer feeder intimidate you; it’s a relatively easy project. The drum will have a hole in the bottom, which you cover with a washer. To allow the deer to access the food, you connect a light object to the washer.
When they bump into a light object, it displaces the washer, allowing the food to spill out and enabling them to feed themselves. Let’s start with the basic materials that you will need to construct your DIY feeder before moving onto the construction phase.
Materials and Tools Needed
Here are the essential materials and equipment that you will need to construct a cost-effective DIY deer feeder:
- Electric or cordless drill
- 1” drill bits
- 5-gallon drum
- The drum’s lid
- Wood saw
- Measuring tape
- Threaded rod, 36″ longx1/4-20
- Washers: 0.25″x 5
- Washer, 1×2”
- Nuts: 0.25”x6
- Lumber: 15” length, 1″x2
- Use a metal coffee can or a similar container.
- Rope
- Screws
Instructions
Follow this step-by-step guide to construct your DIY deer feeder. Always observe essential safety advice when working with electric or cordless drills and sharp tools.
Wear gloves and safety glasses while building this deer feeder, and ensure that you have enough space to do the job well.
- Use a 1” drill bit to drill a 1” hole in the bottom end of the 5-gallon drum.
- Measure and saw the wood. You will need enough wood to place it inside the bottom of the drum. For this purpose, cut a piece of wood a little longer than 10 inches. This 10-inch piece of wood will be used for the threaded rod pivot. For the remainder of the woodcut, cut two 2” sections off each piece.
- Take the 10-inch piece of wood and drill a hole in its center. This hole must be a little larger than the threaded rod, which will serve as the pivot, and must have some leeway to turn.
- Next, attach the two vertical wood pieces to the horizontal 10″ wood piece using screws or nails. The objective here is to construct a bridge.
- Take your metal coffee can and drill a 0.25” hole through the middle of one side (not the bottom of the can).
- Now, you want to block the hole. Thread a nut, 1 x 0.25” washer, and the 2” washer, followed by a second 0.25” washer, onto the rod. Combine the two nuts.
- Add a nut and washer to each end of the metal coffee can to enable you to secure it to the end of the threaded rod.
- Place the bridge on the feeder.
- Stick the rod up through both holes. Use the washer and nut to secure the rod in place.
- Ensure that you adjust the 2″ washer so it fits in place approximately 1″ below the hole in the bucket.
- Use the rope to tie the feeder to a tree. Make sure it hangs low enough for the deer to bump the washer, allowing the food to fall to the ground.
- Fill the feeder with appropriate deer food.
- To test the feeder, bump the washer. You want to set the washer so that only a little food falls out with each bump, rather than emptying the entire bucket and wasting your efforts.
Now you can sit and wait to see deer feeding at your new DIY feeder.
Deer Feeder Uses
Hunters and concerned citizens will set up a DIY deer feeder for several reasons.
The most obvious reason for buying or building a DIY deer feeder is to supplement their food source during times of scarcity.
However, there are many other reasons to provide deer with a supplemental food source.
1. An Additional Food Source
A DIY deer feeder is an excellent reason to provide local deer populations with an additional food source. Natural deer food sources wax and wane throughout the seasons, making it difficult for deer populations to access enough food to sustain themselves.
However, there are specific parameters for setting up food sources, as deer populations will already have access to leftover corn from harvests. Also, other natural foods are more nutritious than a constant supply of corn, which can be harmful.
2. Bow Hunting Season
Bow hunters can set up a DIY deer feeder to make it easier to nab their prey.
Before the rutting season starts, you can attract young buck with a DIY deer feeder. This technique allows you to get the pick of the herd.
3. Your Property is Expansive
Although a deer feeder cannot be erected on public property, you can build one on private property. If you have a ranch or a property covering a few acres, you have sufficient space to erect a DIY deer feeder or multiple deer feeders.
They are an excellent method to attract deer populations to a specific area, making deer hunting that much easier.
4. Deer Spotting with Trail Cameras
If you aren’t fond of hunting but love game spotting, setting up trail cameras brings enormous pleasure to wildlife lovers.
A DIY deer feeder is an ideal location to install trail cameras for ongoing viewing pleasure.
5. Patience Isn’t One of Your Virtues
Hunting is exciting but can also be tedious. Waiting in a ground blind or tree stand has its upside, but patience can be exhausting if nothing happens. Learn how to build a DIY deer feeder to give you an edge.
DIY deer feeders are an effective way to attract all deer sizes to your location, rather than hanging around in trees and only spotting animals that are too small to kill.
6. A New Learning Curve
A DIY deer feeder provides you with the opportunity to learn about wild animal behavior. Combine a feeder with a camera, and you can watch deer, their feeding times, and note their sizes.
All this information will give you advance knowledge of deer behavior before the hunting season begins. You can then use this knowledge to your advantage.
Is it Legal to Build One By Yourself?
DIY deer feeders attract wild animals to you, making it easy to kill your prey. But there are several problems with DIY deer feeders, which is why it is illegal to erect them in many states.
Not everyone follows proper feeding protocols. The irony of DIY deer feeders is that some misinformed individuals provide food for deer populations, which can cause their deaths.
Many deer feeders don’t provide appropriate food, which results in widespread Chronic Wasting Disease (CWD). Acidosis is another reason why DIY deer feeders are illegal in many states.
In the winter months, wild deer consume high-fiber natural foods rather than those that are low in fiber and high in carbohydrates. If deer suddenly start eating grains with low fiber volumes, it causes acidosis because their gut cannot process this food source.
The result is that the deer dehydrate as the lactic acid builds up, the deer dehydrate, and they can die within one to three days. If your state does permit DIY deer feeders, then ensure that you mix protein with the food.
A 16 to 20 percent protein mix with corn and other foods is preferable to feeding corn to deer in isolation. It is best to use high-quality deer food, as companies are currently researching the nutritional needs of deer.
Soybeans and acorns are other food sources for deer in late summer and early fall. During the rest of the fall and over the winter, you can add wheat, oats, or triticale to the DIY deer feeder throughout the fall and winter. Legumes such as alfalfa, winter peas, and clovers are also healthy nutritional food sources.
Before setting up a DIY deer feeder, check whether it is legal in your state to erect one of these devices. If it is legal to construct a DIY feeder in your state, you can follow these simple instructions to begin your new project.
Wrap-Up
Building your DIY deer feeder is a simple process. Once you confirm if state laws allow the installation of a deer feeder, you can proceed to construct one for your property.
The rewards of watching hungry deer feed nearby are heartwarming and informative.
Build your own DIY deer feeder today to learn more about deer behavior, whether for fun or on your next hunt.